
Well, it's been about two years since my last post on this blog, so going on my performance over the last ten years or so, it must be time for a new post!
As I mentioned at the end of my last post, I was, at the time, about to retire from the editorship of AMRM. Hard to believe that was nearly two years ago... being retired is great!
In that time I have been steadily working away on Lambing Flat and it is now 'complete' (though far from finished), just in time for it to be dismantled and moved to a new location! In early 2021 I purchased a very pleasant 'retirement' home in Cowra, NSW, (yes, Lambing Flat is going (almost) 'home'!) and after many delays, mainly caused by the various Covid lockdowns and the severe shortage of tradies, I am finally ready to move in. The date has been set and by the 1st August, I, Lambing Flat and Leo the Blunderdog should be happily setting up in our new home.
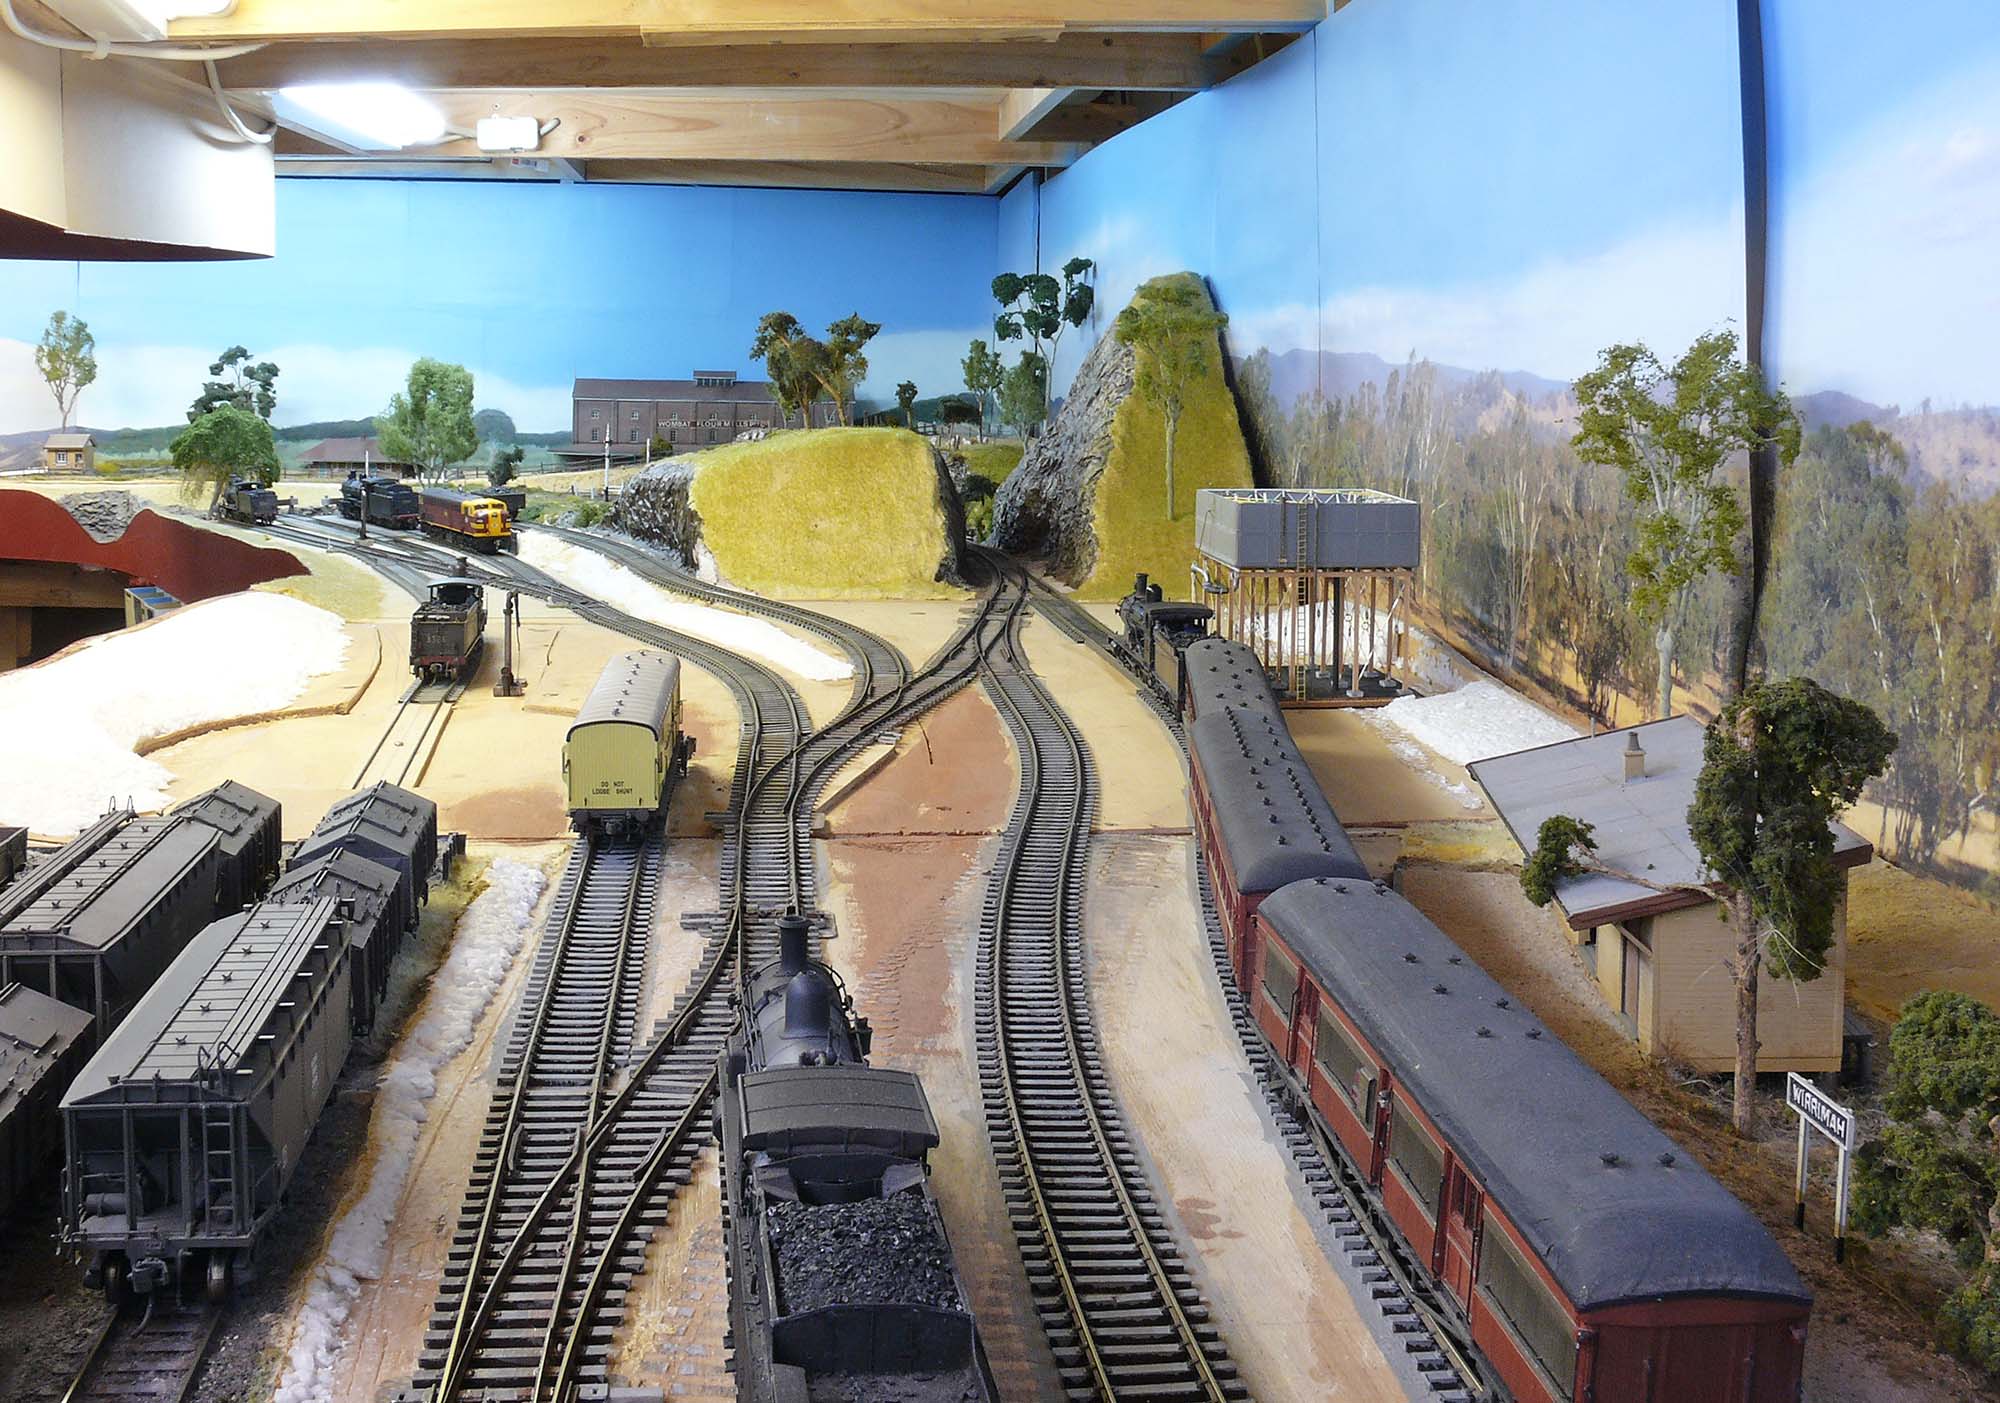
Now, with the preliminaries out of the way, we come for the reason (excuse!) for this post. While I have expanded the layout and completed most of the scenery, there were a couple of areas that had not progressed beyond the track and carved foam stage of scenery construction. With the move rapidly approaching and my realisation that those particular sections would not fit in the new space, there was no point to finishing them, but the bare foam was very jarring and detracted from the 'look' of the rest of the layout. What to do... then came the 'lightbulb' moment... I remembered Marcus Ammann's rather clever use of 'impressionistic' scenery on some parts of his very extensive layout and how effective it was. So I thought, why not just use my acrylic artist's paints (used for the 2D backscenes) to quickly apply some colour to the 3D sections as well! I splashed a bit of paint around one Sunday afternoon and the results can be seen in the accompanying photos (and the header photo). It may not be as detailed as finished scenery, but it doesn't ruin the illusion as much as unfinished scenery does.

This is the unfinished section between the mill scene and Bulla Creek yard in 2020. I was not happy with the track arrangements and it won't fit in the new space anyway.

The same view, taken about an hour ago. Since the first photo was taken, the hill to the right of the main line has been reduced in height and the section of hill between the main line and the loco depot has been removed. The water tank has also been finished (more on that below). Once more, while not as good looking as finished scenery, it gives an impression of scenery and blends in far better than it did in the earlier view.

Another view of the 'impressionist' section with some 'real' scenery behind along Back Creek.
I've come to the conclusion that this is a very quick and effective method of 'filling in the gaps' of an incomplete layout and will be doing this to unfinished sections in future until I can schedule the time to apply more detailed scenery.
As mentioned above, the NSWGR water tank I was building in the previous post has now been completed. Here are some images of it.

By 16th May 2020, the water tank looked like this. The base colour is an airbrushed coat of Tamiya XF-24 Dark Grey. The concrete footings and the drain were hand painted with Top Coat 'Concrete' colour, while the ends of the water crane were picked out with black and the silver section hand-painted Tamiya XF-16 Flat Aluminium. Weathering consisted of various 'washes' of very dilute in isocol alcohol Tamiya XF-10 Flat Brown, XF-52 Flat Earth and black. The plywood base was painted an earth brown and then a light covering of my 'earth' and 'ash' dirt mix, plus a bit of green scatter material, glued on as per my normal scenery making method. Then I had to gradually pour layers of Woodland Scenics Realistic Water to represent the water. What a saga that turned out to be...

Ten months after the previous photo the water pour had finally been completed! I first spent a month carefully pouring layer after layer of Woodlands Scenic Realistic Water, but I wasn't completely happy with the final result. The Realistic Water was easy to pour (just time consuming as one can only pour a couple of millimetres at a time, wait a day for it to dry then pour another couple of mm), but, in this circumstance, it manifested a terrible meniscus that was quite unsightly. By the end of June 2020 I has reached the top of the tank, but the water wasn't level at all, with that unsightly meniscus showing everywhere the 'water' came into contact with anything. I tried painting the 'humps' a greenish hue to disguise it as algae, which did alleviate the problem a little. As mentioned earlier, I wasn't happy with it, but I couldn't think of any way to improve it, so I just placed it on the layout and got on with other things.
After a couple of months of not going out to the layout room for various reasons, I came back to find that the water had shrunk about 7-8mm below the original surface and looked even worse!
At first I experimented with adding layers of Feast Watson Decking Oil obtained from Bunnings (I had used all the Realistic Water I had, plus I wasn't happy with the result from using it anyway). This worked for a couple of layers, giving a nice dirty water effect, but then the surface started to 'wrinkle', long before I reached the needed 'top' of the water.
Ah well, looks like I'd have to get some more Realistic Water and just put up with the substandard result... However, a trip to MRRC at Blacktown revealed that they had sold out of Realistic Water and weren't going to be able to get any more any time soon (the supply chain had been completely disrupted by the COVID epidemic). They did have some Woodlands Scenic Deep Pour Water however, so I decided to give it a go.
I wish I had used this stuff to start with! It is very easy to use, can pour much thicker layers and has a much smaller and less obtrusive meniscus. I'm now very happy with the look of the 'water' and the tank has been on the layout ever since. Now, my only frustration is that all that intricate interior detail I spent so much time putting in the tank is all but invisible under the water!

Another shot of the completed tank.
That's it for this post; see you in two years!


